
We’re restoring a Losi XX CR Kinwald – Part III Rear End

This is the third in a four part series of weekly posts detailing the restoration of a 1998 Losi XX CR Kinwald which we’ve owned for over 10 years but not done much with.
You can read Part II here: https://racewayone.com/wp/2021/02/14/were-restoring-a-losi-xx-cr-kinwald-part-ii-front-end/
Episode: 7
Is the rear end of the Losi XX CR Kinwald different to the regular Losi XX?
Yes, the early cars had rear arm mounts moulded into the T-plate, the CR and CR Kinwald had a seperate arm mounting plate.

19th February 2021 – This is where we left things off last week.
We’ve completed the front end apart from the shocks, front skid plate and wheels. So far the car has gone together very well and we’re excited for the end result.

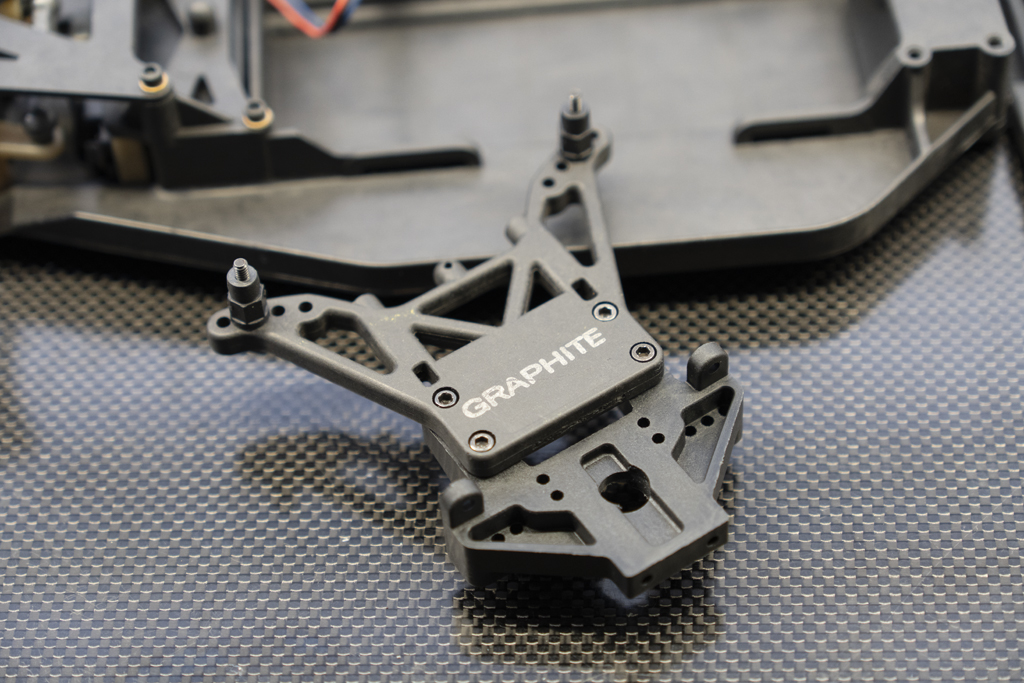
The Losi XX CR Kinwald rear end components are a T-plate, 3 degree toe/0 degree antisquat rear arm mount and graphite rear arms.
As before, we have lightly polished the hingepins before fitting with the aid of polishing compound and a drill chuck. The car’s hingpins are only retained by e-clips at one end. The pins cannot escape in the other direction. All the screws are new.

With the rear sub assembly complete, we can fit it to the chassis. The diagram in the manual at this part is a little tricky to work out. I’ve seen countless XX built with countersunk screws in the T-plate where it mounts to the chassis – this is not correct.
When you look closely, there are four cap head screws in the manual which go in this position.

The bulkhead and shock tower sub assembly now needs to be put together. The original bulkhead is in good condition with some scratches and marks on it which we cannot removed as the material is too soft. We’re fitting a new one. The graphite shock tower is in very good condition.
We’ve used a new rear bulkhead. The screws holding it to the chassis fit very well. Again, we have new genuine Losi countersunk screws to fit here – not generic 4-40 screws – everything is a genuine Losi period part!

Driveshafts
The next step is to build the MIP Cvd drive shafts and assemble them into the rear Kinwald uprights. The Kinwald versions have an extra lower/wider ballstud position. This is a legacy from Brian Kinwald drilling an extra hole in the 2-hole CR uprights. The 3-hole uprights would come as a standard component on the XXX the following year. We lubricated the driveshafts with PTFE sticky grease which doesn’t dry out and harden like the kid black graphite grease.

With the driveshafts and tie rods fitted to the to the rear of the car, we only need the gearbox and shocks to complete it. As I build the suspension up onto the chasss, I’m constantly checking the freedom of movement in the arms and joints.
Transmission
The Losi XX gearbox was unusual in its design compared with the Team Associated Stealth version. The stealth was offered as standard on the Team Associated RC10 Worlds Car at the time.
The Stealth is quite stiff in construction due to being anchored at many points. It’s a very reliable unit however it had high centre of gravity, and a high diff height which were negative characteristics. A total of 8 screws holding it in place.
Losi’s version was probably as stiff only using 4 screws as it utilized internal stiffening webbing, had a low centre of gravity and a low diff position.

I’ve prebuilt the diff with nearly all new components. The critically important shim between the “female” outdrive and the bearing beside it is present. I’ve only included a couple of used components – the casing and the top shaft. Again, we’re using all Losi bearings, and a new idler gear. I have sanded the motor plate smooth and re-anodized it.

A new 84T spurgear, new slipper spring and genuine Losi 4-40 low profile nut leaves the gearbox assembly in A1 condition.
As I’m mounting the gearbox to the chassis, I’m really getting a feeling of getting close to completion. The shocks, wheels and front skid plate are all that I have to affix now to complete the rolling chassis.
That’s where Part III ends.
Over the next week I will prepare the final part, part VI. We plan on building the shocks, wheels and tyres, body and wing – this will leave the car finished.